Hello Beauties!
When I come across a new beauty love, I just can't wait to share it with you! Today I could literally burst with love for this particular Essie nail polish!
It's the Essie nail polish in the shade 'Don't Sweater it!' Considering it's fall, and sweater weather, it's perfect for this time of year!
The nail polish itself is quite hard to describe, it's a mixture of beautiful colours and tones, there's a bit of grey, brown, mink and purple. This means you're left with a colour combination which will blow your socks off! Or sweaters!
The wear of this polish is great too! I find that you only need 2 layers and if use a good top coat the polish doesn't chip. You're left with a beautiful little shine on your nails, and I think that it could easily pass as a gel nail polish in the looks department!
This is definitely my favourite nail polish for Autumn and Winter, so sorry if you get bored of seeing this on my nails, I just love it too much!
Have you tried this shade before or have a special shade for A/W?
L x
Hello Lovelies!
I hope you've had a good weekend! Today I wanted to do something a bit different, I thought I'd start testing out some different celebrity makeup looks. So I hope that you enjoy them and that you like them too!
Today I chose a natural makeup look inspired by Rosie Huntington-Whiteley. This look is more of a dewy/healthy look with soft gold/pink eyes and nude lips.
For this look I've used a mixture of high end and drugstore products so if you are inspired to try it out, it's a bit easier to! But I'm also going to try my very best to suggest a good dupe/cheaper product if I use a high end one, that'll work as equally well.
The Products
Foundation: MAC Mineralize Moisture Foundation OR L'oreal True Match Foundation (really good similar finish!)
Concealer: KIKO Skin Evolution Concealer
Eyes: Urban Decay Naked Palette + Charlotte Tilbury Champagne Diamonds eyeshadow stick. KIKO sell lots of these sticks so a possible one is golden beige.
Contour: Charlotte Tilbury Filmstar Bronze and Glow. Sorry can't think of a specific dupe here, if you have one please let me know!
Mascara: Both Bourjois Volume 1 Seconde mascara and KIKO Lengthening Top Coat Mascara
Lipstick: MAC Blankety
Blush: The new Hourglass Ambient Lighting Blush Palette, particular shade Champagne Rose. ELF have some great baked blushes which can replicate the look.
The Steps
1. Rosie has a dewy/glowy finish, so I felt that this particular MAC mineralize moisture foundation was good. I have many foundations which can create a dewy look, the L'oreal true match foundation is an amazing drugstore foundation to achieve this!
2. Next I applied the concealer in the areas which I needed it, so my panda eyes, around my nose and my chin. I highly recommend this concealer, it's definitely a concealer which I am so impressed with. Great coverage and great value!
3. For my eyebrows I used the Anastasia brow wiz, my brows have quite an arched shape, but Rosie's are pretty straight, so I used the spooly to brush the first part of my eyebrow upwards and then for the second part of my eyebrow I brushed more downwards. I just filled them in slightly as her brows aren't too dominant in this look, so make your eyebrows as subtle as possible.
4. For the eyes I went in with the Naked palette. The shades which I used were: Virgin, Sin, Half Baked, Smog and Toasted. I also applied the eyeshadow crayon in the shade Champagne diamonds to the inner corner of my eyes.
5. I haven't used any eyeliner in this post, as I wanted to achieve a softer look.
6. I used the Filmstar Bronze and Glow to contour and highlight. Contouring my cheekbones and then highlighting down my nose, slightly under my eyes, forehead in T shape and on my cheekbones.
7. I added some blush on the apples of my cheeks.
8. Mascara came from the Bourjois Volume 1 Seconde mascara, I used this for 1 coat to fan out the lashes, then went in with the KIKO mascara to add some more length, especially concentrating on the outer lashes.
9. Lastly I applied a swipe of MAC Blankety, which is a creamy pink/beige nude lipstick. Perfect for this look.
I hope you enjoyed this post, I certainly had fun trying to copy this look! Let me know your thoughts on this look and whether you enjoy these kind of posts?
Happy Monday!
L x
Hello Lovelies!
As most of the week has passed already, what better time to have a little treat to pick you up just in time for the weekend! And this little treat comes in the form of a super special mask.
It's the GlamGlowThirstymud Hydrating Treatment. This mask aims to deliver instant hydration which is perfect if you have dry skin like mine in desperate need of a little TLC!
This treatment aims to lock in moisture, refresh your complexion and leave you with the softest and smoothest skin. But does GlamGlow live up to their great reputation?
I definitely think so. The thing I particularly love about this treatment is that you can choose to wear it for either 10-20 minutes like a usual mask, or you can use it for overnight use for more of an intense hydration. This is particularly great if your skin is extremely dehydrated and in need of a good moisture surge! Alternatively for those travellers, this mask is fabulous for plane travel.
The formula itself is more of a gel consistency, in the pot it looks quite a brown colour but once applied to the face it applies fairly clear and you can barely see it. This formula has the most amazing scent, that's if you love a coconut scent! It smells heavenly which is always a bonus for a relaxing face mask session!
After washing of this mask, it is extremely clear to see why it has such a great name for itself. My skin feels so silky and smooth, and that beautiful glowy feel is left. The mask itself is not sticky at all, so no unpleasant sticky residue is left on your face. The best thing is that my skin feels healthy and hydrated! I feel like I don't even need to apply my moisturiser after I've used it because my skin has absorbed so much of the formula.
GlamGlow definitely has the thumbs up from me, and I'd definitely give it that star which it already has on the packet!
Have you used any GlamGlow masks before?
L x
Happy Monday Lovelies!
Hope you've all had a top weekend! Now as Halloween is fast approaching, I thought it was time to start practicing some fun sugary recipes for the big event.
So this Monday is all about the C's! Yes Candy Corn Cookies! What better way to start the week than with biscuity goodness full of orange and yellow sweets. Not forgetting the white chocolate chips!
These bambinos are the perfect spooky treat for a fun and vibrant Halloween!
So here's what you'll need to make these crazy cookies:
Makes 12
4 Tablespoons of butter
1/2 cup of sugar
3/4 cup of all purpose flour
1 egg yolk
1/4 teaspoon of baking powder
1/4 teaspoon of vanilla extract
1/2 cup of white chocolate chips
1/2 cup of candy corn sweets
And here are the directions:
1. Preheat your oven to 350 degrees and grease a baking sheet. I always use spray oil, quick and easy!
2. Combine butter and sugar in a bowl and mix well. Next beat in the egg yolk, baking powder and vanilla extract. Then add in the flour, it should start to form a dough.
3. Spoon out balls of cookie dough, place on baking sheet and flatten. Leave about 2 inches apart. A top tip is to make sure that the candy corn is not touching the base, as these have a habit of melting and then will stick to your baking sheet. To avoid this try to dot the candy corns in the middle and on top. You should get around 12 cookies.
4. Pop the baking sheet in the oven for 9-10 minutes. The cookies can look uncooked but you will notice the edges starting to crisp slightly. Remove them at this stage as they will crisp up out of the oven.
5. Leave on baking sheet for 5 minutes and then transfer to wire rack.
6. Enjoy your candy corn cookies!
These cookies are pretty simple and easy to make! Because if I can make them, anyone can!
Hope you've enjoyed this cookie post, I certainly have as my home smells just like a yankee candle and is full of cookies! Winning combination!
Have you ever made any cookies like this before?
L x
Good Morning Lovelies!
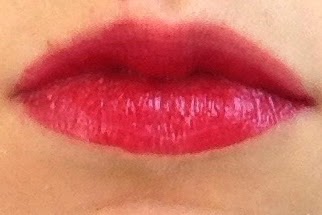
Today to get into the true Halloween spirit, I thought I would share with you a special MAC lipstick to get you ready for the spooky season. The lipstick which does just that, is MAC Oblivion! This is their new lipstick from the Rocky Horror Picture Show collection. There are 3 other lipsticks in this range too, but they're selling like hotcakes.
I must admit I wasn't overly taken or excited on hearing the news of this release, but then I saw it in store, tested the lipsticks out, and then I was completely sold.
The packaging is really unique and eye catching itself! It has the lips on the front of the packaging which is definitely very fitting for a red lipstick!
Oblivion itself is a medium red lipstick described as being vivid with blue undertones. When swatched and worn it comes off a lot pinker on me than I thought it would. It appeared to be a raspberry kind of shade, which I was a little bit surprised at as I wouldn't have guessed that the blue undertones would turn it out like this. As I completely love wearing these kind of pink tones, this shade is perfect for me.
Also as Oblivion is an Amplified Creme lipstick the finish is lovely, it's extremely moisturising and leaves lips looking soft and full and you get a little shine on the finish too. I found Oblivion to be very long lasting which is always a bonus for a lipstick wearer!
Overall I love this lipstick release, the shade is great for me, it's a red which can be worn without being too shocking. It's still relatively understated but you definitely know it's there! However the one thing I would say is that it's not particularly unique. There are probably a few lipsticks out there which would be perfect dupes. I'll just have to have a little lipstick shop, swatch and hunt for them.
Have you tried this lipstick or do you plan on trying any lipsticks from the Rocky Horror picture show collection?
L x
Happy Weekend Beauties!
Now I must admit, I've never really been an Estée Lauder fan, I've always seemed to have bypassed her makeup counter for some strange reason. However recently I've discovered lots of Estée Lauder products which I am absolutely loving!
I've been using this Estée Lauder Take It Away Makeup Remover Lotion daily and I'm really impressed by the quality of it. It's just like a cleanser, but it comes in a lotion form. This means it's incredibly soft when you apply it and it has a lovely gentle scent too. I find that the amount of makeup/dirt it removes is incredible. It seems to get rid of everything, which some other cleanser type products can fail to do. The best part is how soft it leaves your skin feeling afterwards, it feels somewhat moisturised, without a sticky/greasy after feeling. I feel so refreshed after using this product, that I actually can't wait to take my makeup off.
As this is a mini version of the product, there is no question that I will absolutely be buying the full size version when I run out!
Have you tried this Estée Lauder Take it Away Makeup Remover Lotion?
L x
Happy Little Friday!
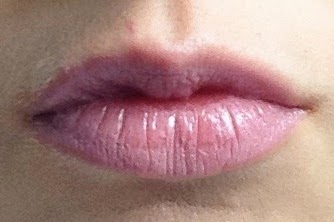
Today I have a brand spanking new lipstick to share some hearts about! Because I'm a lipstick addict and a MAC lipstick addict, I'm being true to my obsession and showing you a MAC lipstick! It's in the shade Feed the Senses! And does its pink/nudeness feed my senses? Yes it sure does!
Now this particular shade is from the Lustre range, which means it can be a little sheer once applied. It's a pretty pink toned lipstick with purple/mauve tones peeping through! Once applied it's a dream if you're after a gorgeous subtle nude. It's not overpowering and therefore is an incredibly subtle shade for everyday lipstick wearing! As it's a lustre I find that the staying power of the lipstick doesn't last so long, only about 2-3 hours. However that doesn't really put me off this shade, because it's so pretty and ticks all the other boxes which many nude lipsticks fail to deliver. It's been added to my line of favourite everyday lipsticks! (which gets longer and longer by the day!)
Have you tried this MAC shade before?
L x
Hey Lovelies!
Today I thought I'd care to share a nail polish with you all!
It's a YSL baby in the shade Taupe Graine 53. I saw this nail lacquer in the store and thought it looked such a beaut for Autumn/Winter. So it was quickly purchased and put to the test!
Now me being me, didn't quite realise that the texture of this nail polish was a bit different, so whilst I was applying it I got a bit confused! Then I put 2+2 together and realised it was a grain kind of finish!
So I applied 2 and a bit coats and this is the end result:
Well, You apply this nail lacquer like normal and it goes on pretty smoothly, but then after a few blinks it starts to transform into the grainy finish! Pretty unusual and super special if you're wearing this colour for an evening out. The colour itself is taupe and it appears brown/silver depending on how it catches the light. A very lovely combination which once on looks very sophisticated and unique.
How would I describe the finish? A smooth sugar scrub, if that makes sense?!
The colour and finish is gorgeous and as it's another baby from YSL it's super easy to apply whilst the end result feels very luxurious. I know this texture finish/matte look is not everyone's cup of tea, but if you do like this cup of tea, then I really recommend you try this shade as it's a perfect cup!
Have you tried this shade before?
L x
Happy Friday Buttons!
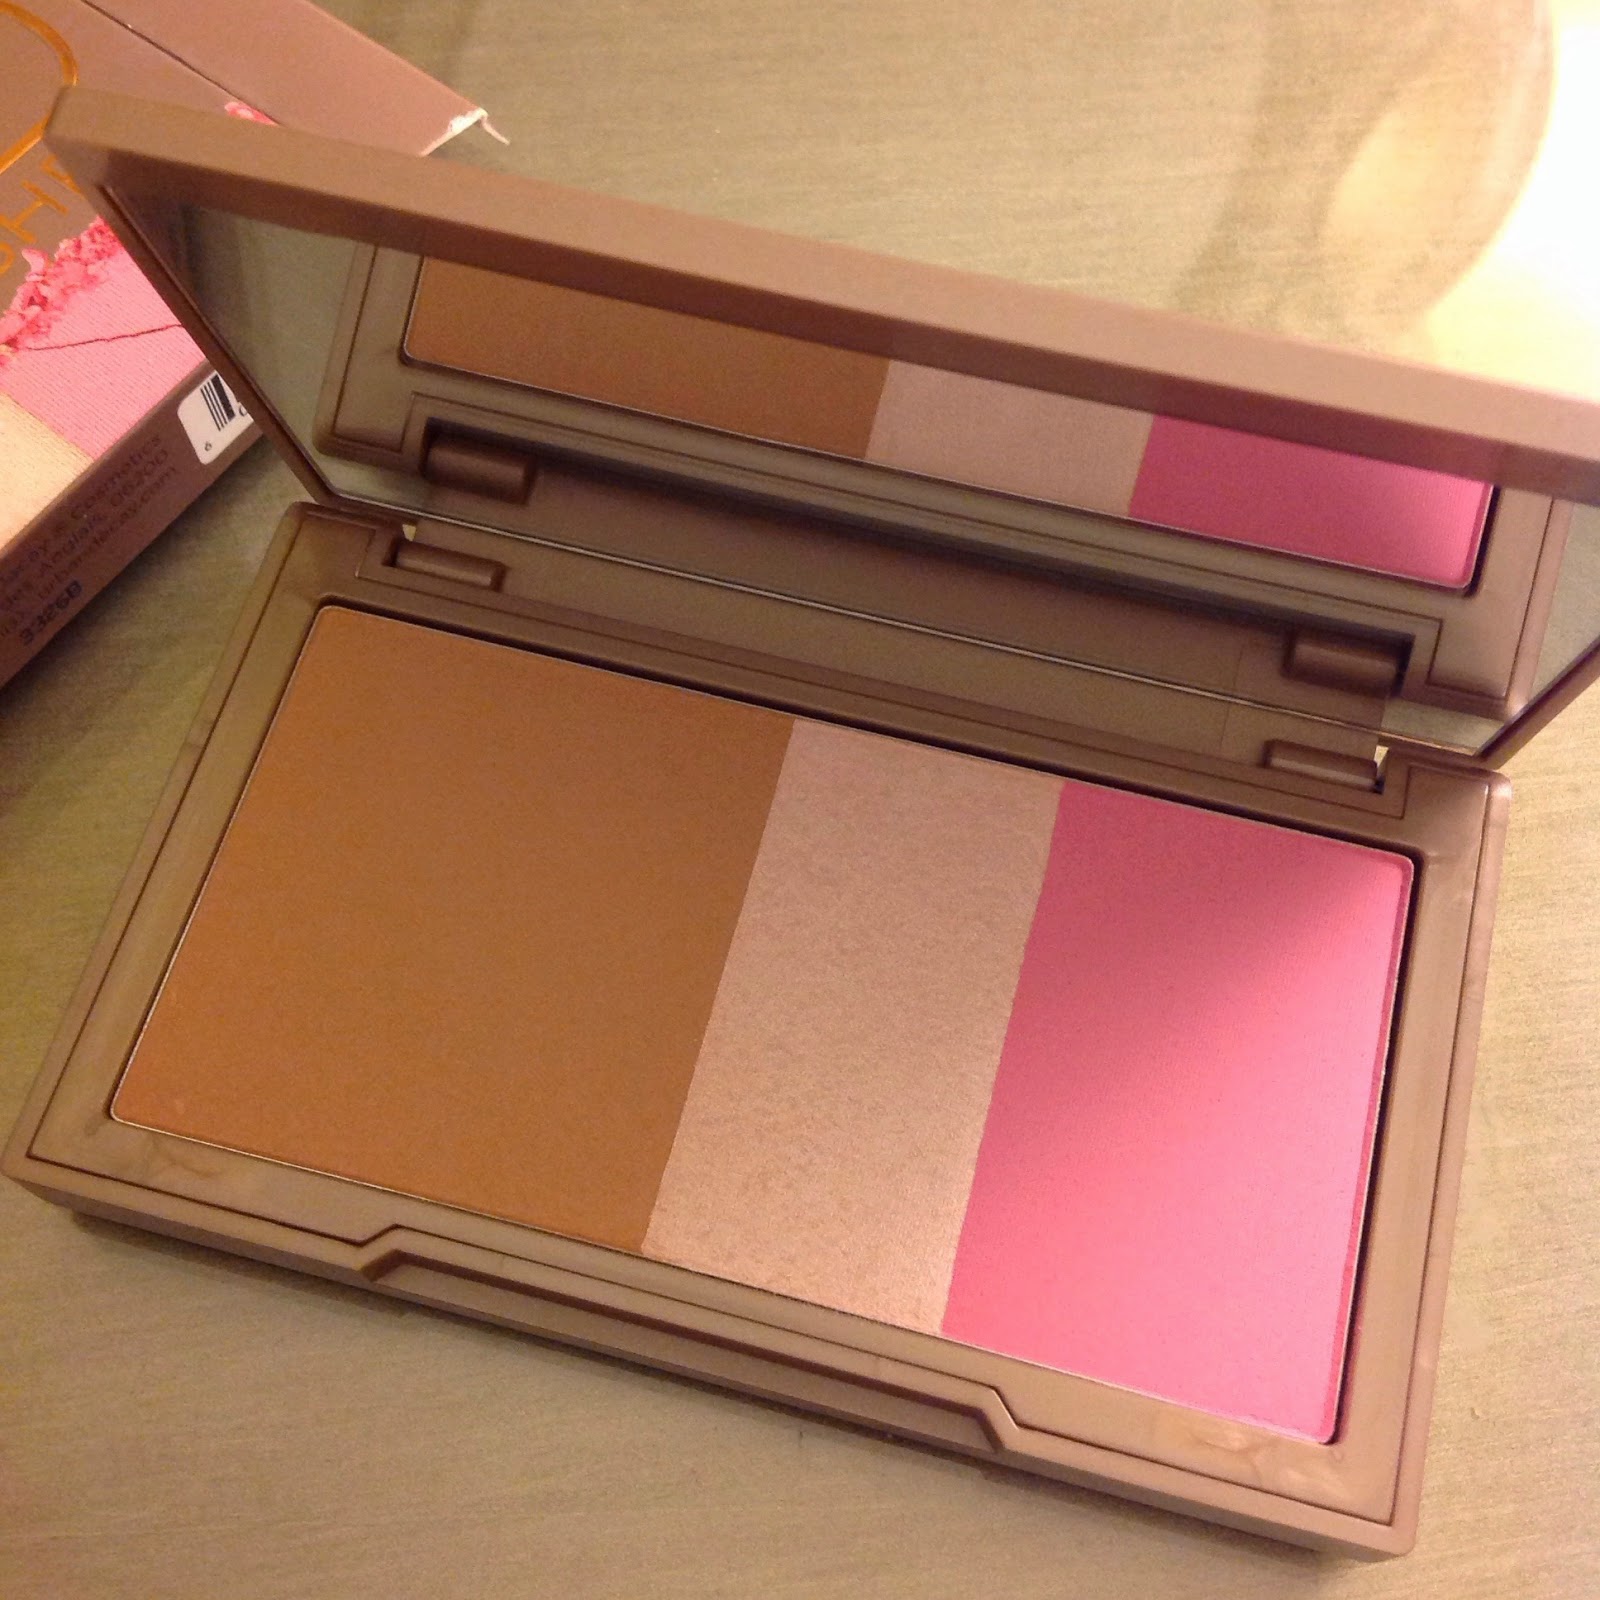
Now a few months ago, I bought this lovely Naked Flushed palette by Urban Decay. I forgot all about it until I discovered it hiding in the corner of my room (these finds are the best!) It's a Bronzer/Highlighter/Blush palette all rolled up into one. This palette is in the shade Native, and something about the way this looks just reminds me of Neapolitan ice cream! (maybe they should rename it!).
What I love about this trio, is that it's all in one place, no searching for three different makeup products in that overflowing makeup bag! It's ready to delve into for some beauty magic!
I love to start with the bronzer and then move onto the pinky blush and then finish up with a sprinkle of highlighter. Now it's quite acceptable to mix them all together and use that combination to sweep over your face. But I'm one of those people who hates to ruin the perfection of the palette and always try to keep my makeup looking as perfect as possible!!!! Silly I know, but I may have to venture into the makeup mixture with this palette. This particular shade is the pinker one of the collection but there are also 3 other palette shades which may be of use to your particular skin tone, these are Naked, Streak and Strip.
The product itself is so silky and creates such a beautiful radiant glow when applied. It goes on incredibly easy and smoothly. As I'm always on the go, the palette is great for travelling around and has a giant mirror which is always a bonus.
I will definitely repurchase this product when I run out, but I don't think that will be for a very long time as I'm yet to create a substantial dent in the perfection palette.
Have you tried any of the Naked palettes?
L x
Good Morning Pumpkins!
I still can't quite believe another month has gone by so quickly! Although another month has flown by, I'm pretty excited to see what October has in store for us. Nothing beats attempting to try and carve a pumpkin, and those long debates over what you should dress up as for Halloween!
One year I was an M&M. (Yes, pretty unusual I know!)
For today's post I just wanted to share a few things with you that I'll be loving this new spooky month. Sorry for a bit of a random mixture!
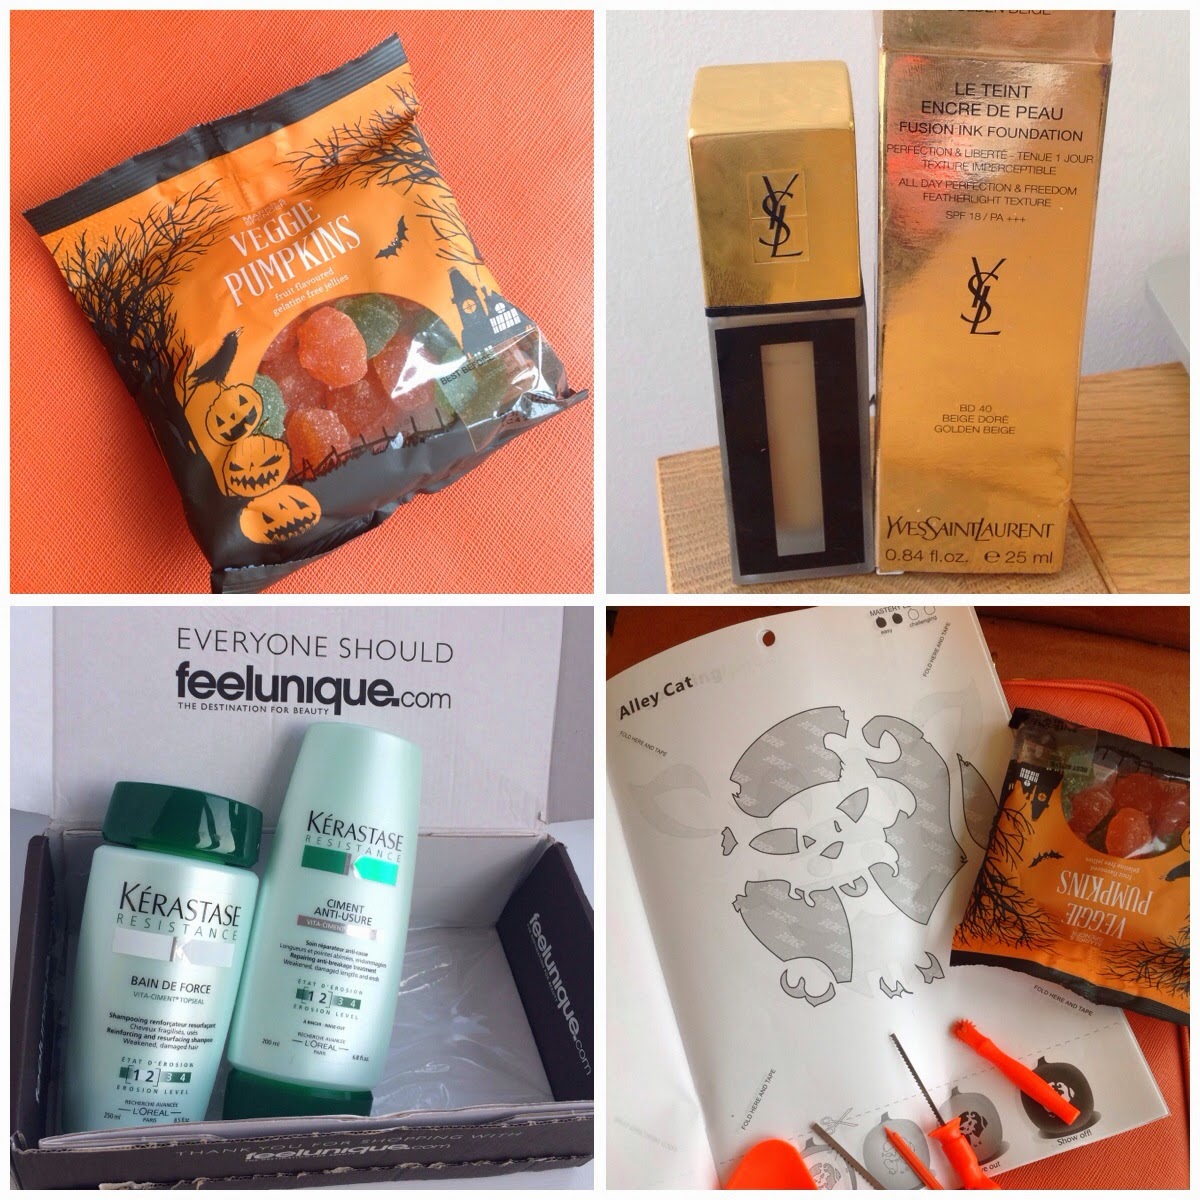
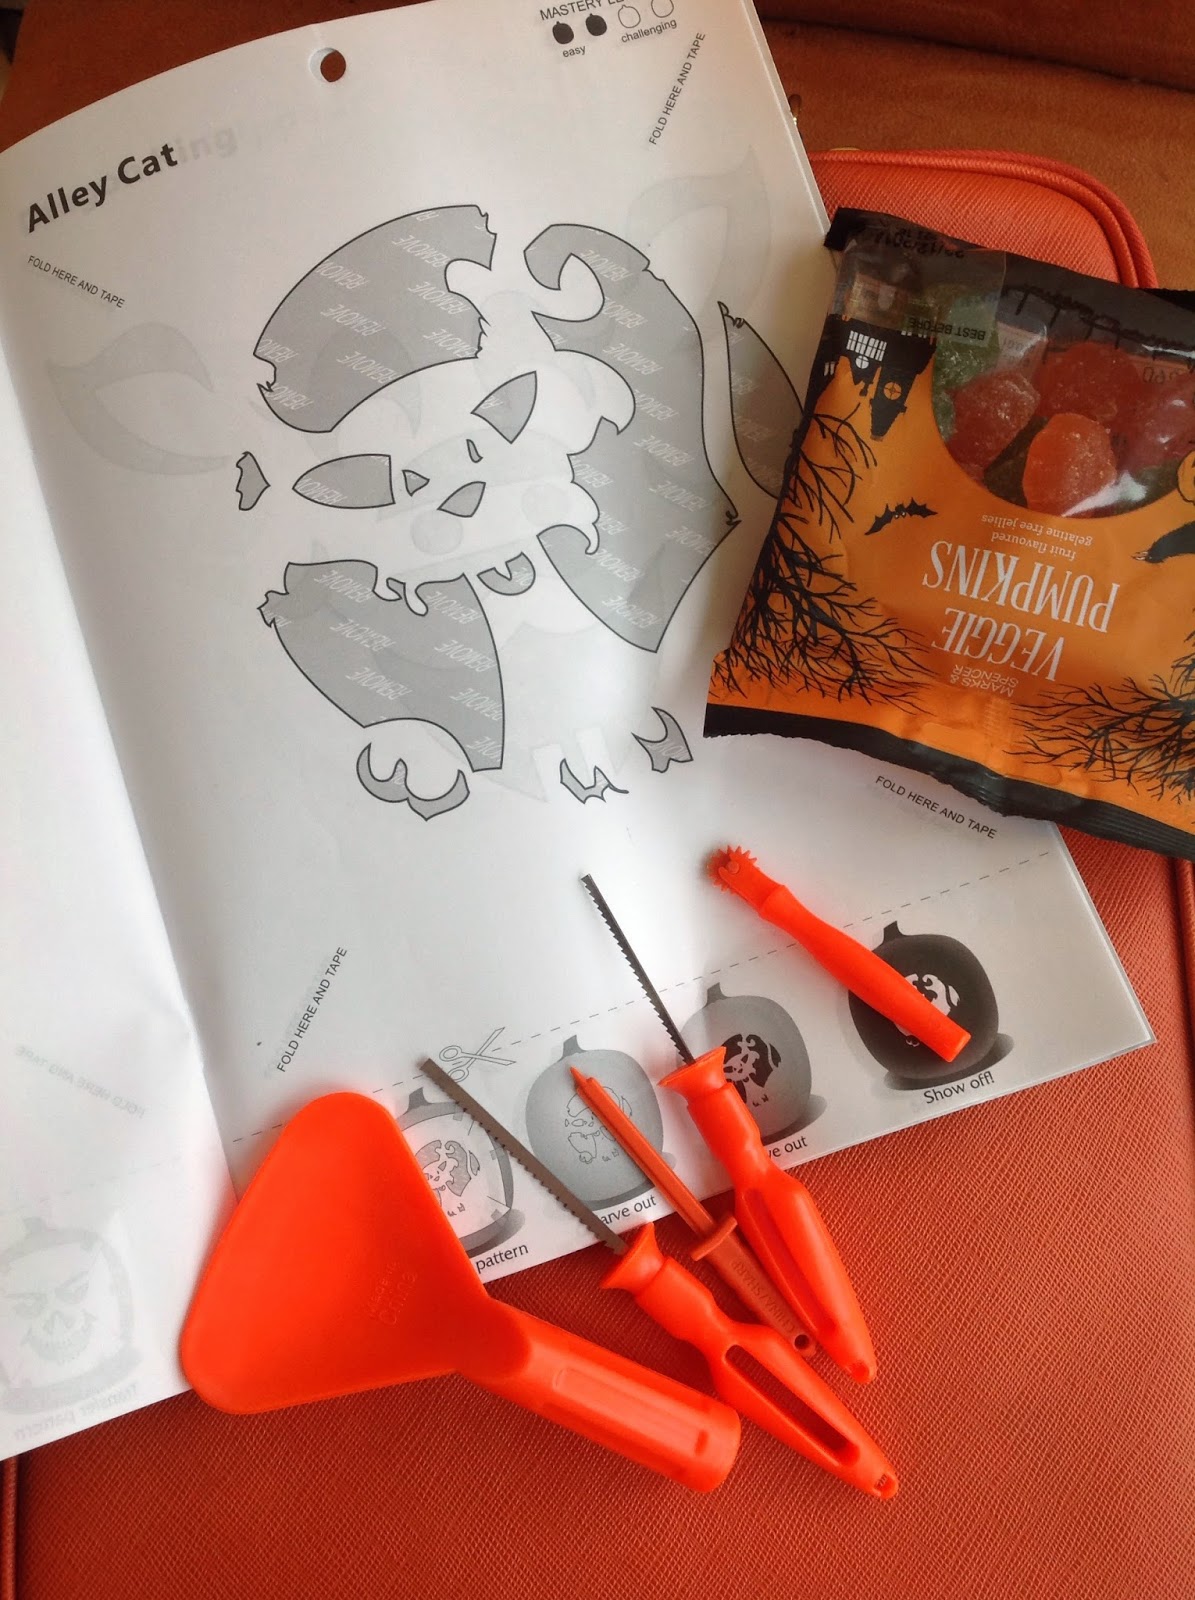
1. Candy/Sweets
I'm a bit of a sweetie addict and so when I saw these Vegetarian friendly sweets in M&S, I knew the Veggie Pumpkins needed to be bought and tried!
2. Foundation
I did say it was a bit of a random mixture, I just couldn't resist saying how much I love the YSL Le Teint Encre De Peau Fusion Ink Foundation. When this is applied it feels so gorgeous and smooth. It gives a lovely flawless finish. Due to it being a lightweight foundation, it feels as light as a feather on the skin, but it's incredible how it can give somewhat of a high coverage finish! Pumpkins in the air for this foundation.
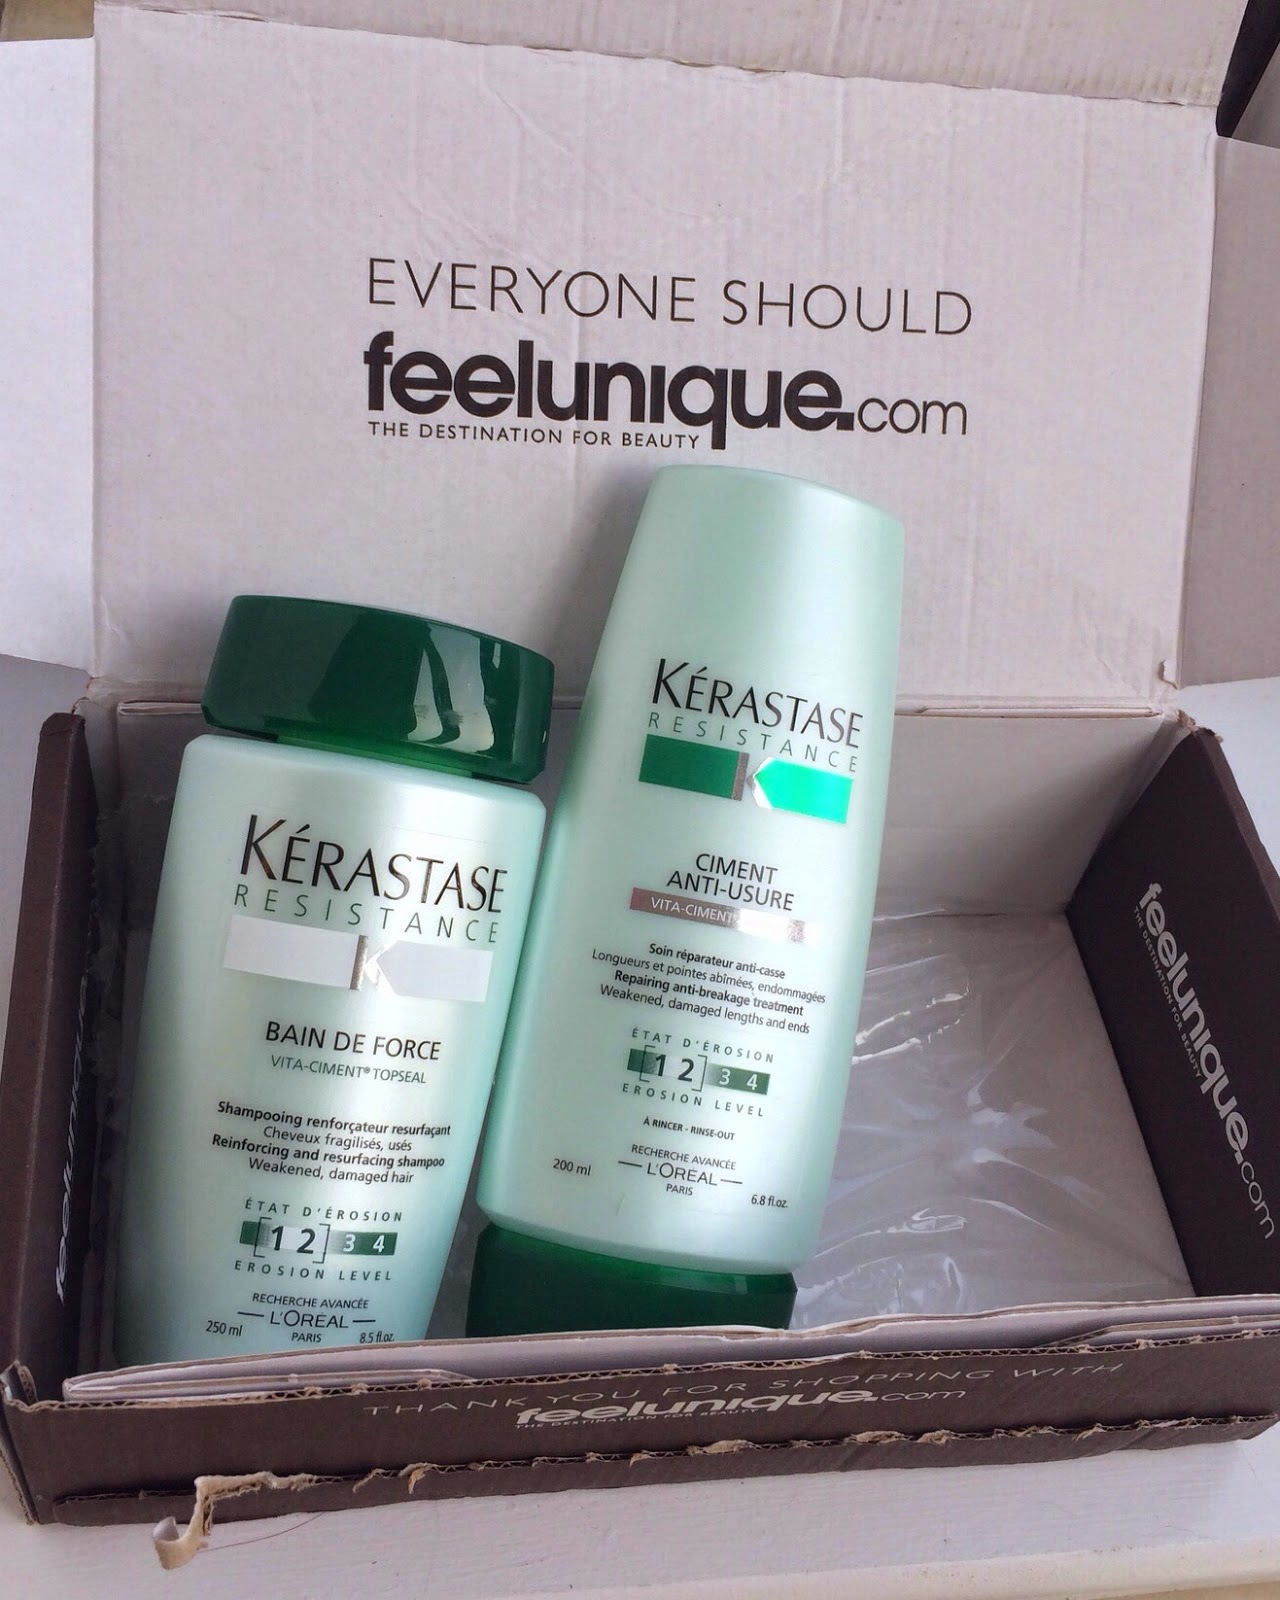
3. Kerastase
I absolutely love this haircare range, it may be pretty expensive but it works some serious hair magic every time! My hair has been feeling really dry due to the combination of sunny weather and damage caused by the numerous amounts I change the colour of my hair. So I was after a shampoo and conditioner which would restore it back to super happy hair! I chose the Resistance range, so the Bain de Force shampoo as well as the conditioner. As every other Kerastase products I've used have been incredible and delivered, I have high hopes for these bambinos!
4. Pumpkin Carving!
Now preparation is key! Call me sad or call me crazy, but this year instead of having a sloshy/hacked mess of a carved pumpkin I've gone all professional with a deluxe pumpkin carving set. I have the tools and the stencil, so some serious pumpkin carving will be going down! Keep your eyes peeled for the hottest pumpkin you've ever seen on the streets! (It's going to take a lot of practice!)
Hope you've enjoyed this unusual combination! What are you loving/still be loving into October?
L x